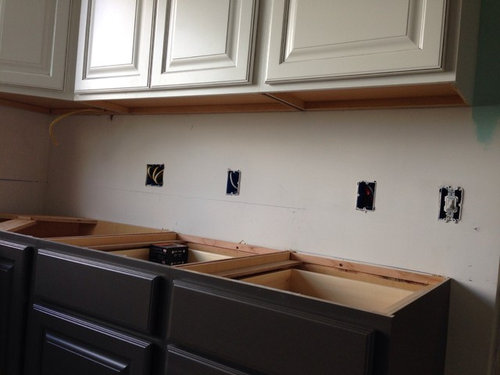
#1 LABEL
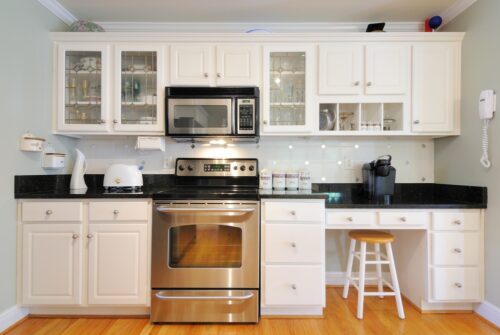
If you count the number of cabinets in your kitchen, you most likely have a dozen or more. And although they look the exact size, they most likely aren’t. Even a ⅛ inch off can change the look of the cabinet, so it is so important to label your cabinets before you take them off. Label them with which side they are on (left or right) and with the name of the cabinet or drawer such as: “next to the fridge”, “above the dishwasher” or “2nd down utensils.”
This will not only ensure your cabinets hang correctly it helps the reinstallation go faster. Label the cabinets on the top edge for the hanging cabinets, and on the bottom edge for anything under your countertop.
Don’t label the back of the drawer or cabinet… you will see why when we talk about paint coverage. Grab a baggie or paper bag to store all the screws and hardware securely.
#2 TIME
There are so many articles out there touting how FAST you can paint your cabinets. I promise it isn’t remotely close to fast. I tell you this because I don’t want you to rush it. Not only will a rushed paint job look bad, but if you planned on one day to finish this job, and it actually lasts 3, your weekend is ruined, and now you are stressed and it is all because someone wanted you to click on their article with false advertising of the quick job!
It is going to take time, realistically 3-5 days. The reason for this is you need to cure your paint, not wait until it is dry. Curing takes at least 24hrs, in some paint, it is 37 hours. Check your paint, in small print, it will state the “Cure time” Hanging cabinet fronts that are dry to the touch, but not cured results in dinks, and screws that pull at the paint.
Plan accordingly. Give yourself a generous schedule of removing the cabinets, cleaning them, sanding them, dusting the sand off, setting primer, painting, painting again… adding a third coat, and then drying and reinstalling.
It will take time, but it will be worth it.
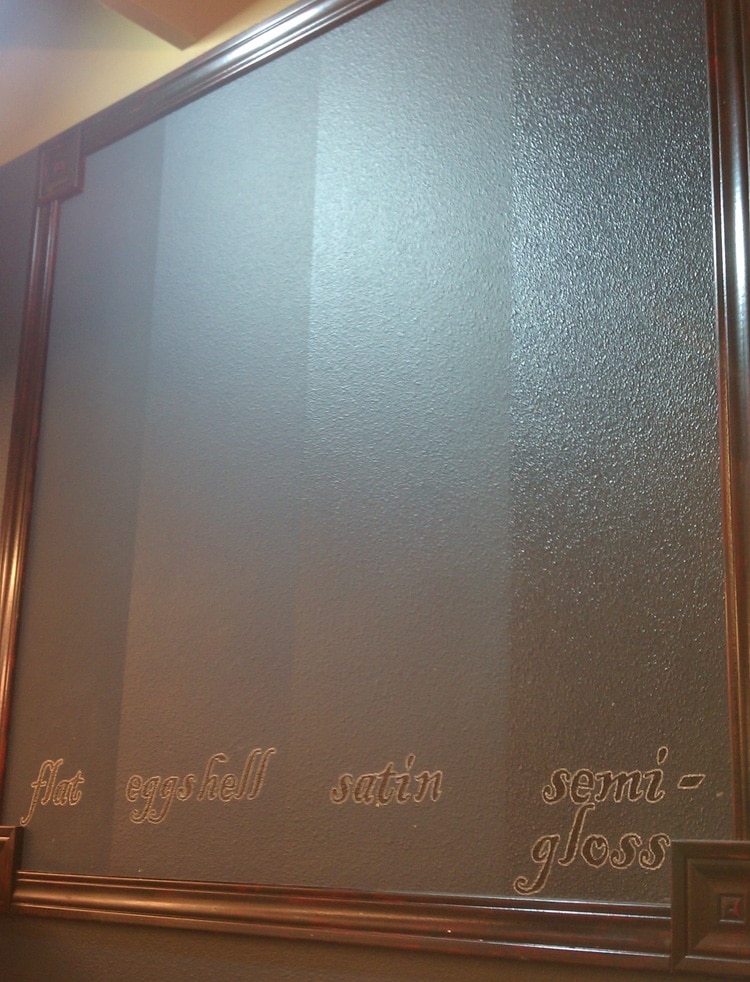
#3 SHEEN
The glossier the sheen, the more durable it. Durability is huge when you are removing marinara stains off your cabinet after your pot of spaghetti overheated, or when your kid decides to learn how to ride his overboard in your kitchen, dinging every lower cabinet. So although matte is beautiful, go as glossy as you can handle. Satin is the bare minimum for people.
#4 TOOLS
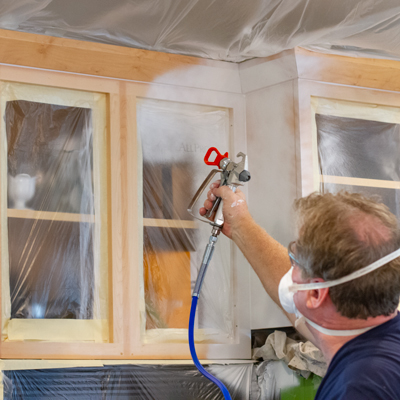
Use a paint sprayer if you can. Rent one (you can find them at Lowes, Ace, or Home Depot, available to rent by the hour or day, borrow one from a friend, you have an awesome friend like that, or consider buying one. I remodeled my home, and so we were going to paint our walls, several cabinet units, and bookcases. It saved us money to buy as opposed to renting one, and now we can be that cool friend to others. If you can’t afford one (good ones start at about $150) buy one and resell it on Craig’s list. There are contractors always looking for equipment.
Spraying not only is faster, but it gives a flawless finish.
If you can’t spray, then use a roller AND a brush. Roll the paint on to apply, (and please have a variety of sizes) then use a CLEAN like-new brush to wipe away any roller marks. You can get brush strokes with this technique if you are heavy-handed (applying too much pressure as you erase the roller marks) or if your brush is not smooth enough (buy a decent brush). Conditioner will also help avoid these marks, which brings me to the next tip no one is talking about.
#5 CONDITIONER
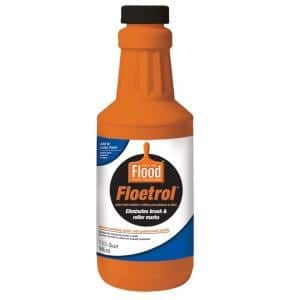
Not very many DIYers talk about paint conditioners. You MUST condition your paint. I personally use Floetrol, and love it. Conditioner slows down the process of drying on purpose, to allow gravity to pull down your roller marks or brush strokes, and beautifully blend them before the paint dries. You don’t need much. 1-2 TBSP of conditioner is good for each gallon of paint. Check the instructions on your specific conditioner to use the right ratio.
Conditioner will lighten your paint. It is EXTREMELY subtle, and most companies tout that their conditioner won’t, but side by side, when I use the conditioner and don’t, I can see a difference. I also am a paint artist and can notice color differences easily, so some of you might not even notice. For those OCD folks, start and finish with a paint conditioner for a uniform look.
#6 COVERAGE
Pinterest is littered with repainting kitchen cabinet images, where just the front is painted, it is so easy! Right?? You need to paint more than just the front and frame of your cabinets. When you hang your new painted cabinets and sit at your kitchen table, you can see underneath your countertop cabinet frame. Make sure you paint the underside of the cabinet frames.
Also, paint the inside (or backside) of the doors. This means you have to wait for them to dry/cure before painting the other side of your cabinets. Always paint the inside first, to allow the outside to cure longer.
Make sure to paint the edges, even the top edges, as this will be very important to the look of the bottom cabinets.
#7 SANDING
I know you guys hate sanding. I get many comments asking if you really have to sand, what if it has no top coat, the previous paint just works like primer right? NO. If a DIYer on Pinterest is saying you never have to sand to repaint your kitchen, they are laying and their focus is on getting more clicks, than for you to enjoy your cabinets.
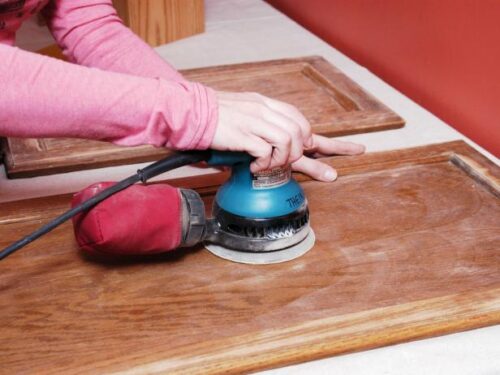
Sanding is required for good-looking cabinets because it gives the opportunity to have a smooth finish and cabinets that close and fit just as they should.
Think about it, if your cabinets are painted already they probably have 3 layers of paint. You are going to add 3 more layers of a new color. You don’t want 6 layers of paint on drawers that you expect to still fit in the frame. If you have inset cabinets, I can’t stress this step enough.
Now, can you get away without sanding your repainted kitchen table or shelf, yes, but cabinets are very much different because you have multiple pieces that need to fit together?
I really hope these kitchen cabinet tips help you with your painting project. I encourage you to try repainting cabinets. It takes time, but it is so much fun to see what you can do. If you want to learn 5 Mistakes People Often Make while Painting Kitchen Cabinets to avoid, then I encourage you to take a few minutes to learn even more.
If you want to save this info, choose a pin below to save!