Repainting desks, nightstands, tables, and cabinets is an easy way to rejuvenate your furniture, and ultimately your room. However all these furniture items have drawers. Drawers are tricky, because if you don’t spray paint them right, you lose the smooth way it slides shut. Spray painting drawer fronts can be tricky too.
Don’t worry though, I have a few tips that I have learned over the years that I’d love to share. Not only will painting drawers be easier, and faster but your drawers will still easily glide in and out, without paint build-up.
Tip #1: Prep
If you pull the drawers all the way out to paint them, then you will need to mask the entire drawer. Painting the sides of the drawer is a big mistake because it affects the width and texture of the drawer sides. To keep the sides unpainted you will need to use painters tape or masking take and cover the sides. Make sure to cover the bottoms where the drawer rubs or glides against any hardware or drawer frame.
To get an even professional paint finish you have to paint the drawers from multiple angles without overlapping too much. Ovelapping will cause an uneven paint job, were some parts are thicker than others, and inevitably more prone to drips.
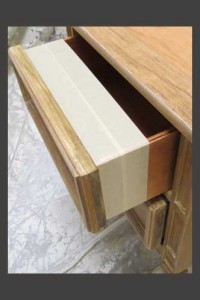
The best trick I have found to paint spraying drawers is to always keep the drawer inside the piece of furniture. Very rarely do I need to take it out. Mask 3-4 inches of the drawer sides. This way you are able to paint your drawers from different angles, without the trouble of masking the entire sides.
Tip#2: Primer
Use spray paint primer. Primer is an “extra” step, and it is an extra cost, but you guys, 20 extra minutes and $4 extra is totally worth it, for a professional finish. Primer lays down a base coat, that creates a even playing field for your wood surface. Wood is trick, the grain in some parts are more porous than others, and will drink in more paint. This creates an uneven look, no matter how many coats you give it. Primer also creates a even canvas for your color.
If there is no other tip you take from this post, take this one. Spray a white primer on your wood furniture, wait until it is dry and THEN start paint spraying.
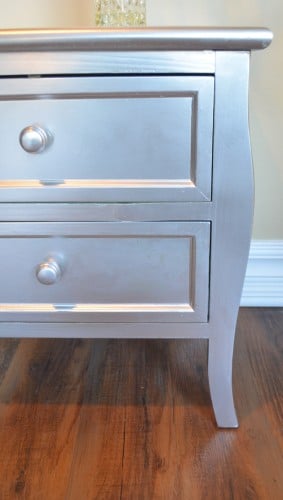
Tip #3: How to Apply
Spray painting can get a bad rap because of uneven finishes. If you have applied a primer, you have half the battle already won. All you need to do is be patient while painting. Spray paint 6-8 inches away from your project and spray a THIN, light even coat. You should be able to see your primer through your first coat. The thinner coats not only dry faster, but they also create more of a stable paint base and prevent your paint from peeling or chipping in the future.
So many people want the finished product so quickly they spray back and forth like they are swatting away a bee. Spray in even strokes left to right for your first coat. The second coat needs to be sprayed top to bottom. A third coat needs to be applied on the diagonal. Many times, three coats are enough for me, but sometimes a fourth one is needed. Apply them all lightly with graceful smooth strokes. You are painting people, shooing a fly.
These tips apply to industrial spray painters, as well as aerosol cans of spray paint. I hope these simple spray painting tips will help you in your next DIY project!

