Ready- to- Assemble (RTA) cabinets are quickly becoming a popular choice for homeowners. These cabinets became popular with IKEA who made the first disassembled furniture. Since RTA cabinets are shipped flat, and dissassembled the price of these cabinets is greatly smaller than traditional cabinets. IKEA isn’t the only company either.
I personally went with Conestoga Cabinetry, a USA made company, however, there are dozens of places that offer RTA cabinets. I have heard great things about Cabinetjoint.com and cabinetstogo.com.
With information online that teaches you the carpentry skills to assemble cabinets, this is an option for anyone willing to learn.
Ordering Tips:
When you order your cabinets, double check every measurement! These cabinets come can be as custom as you want. I went through about a dozen drafts on graph paper before we finalized our choices. Then when the old cabinets were removed, I drew out on the wall where all the cabinets would be. This not only helped me visualize the room, but also helped double check my measurements. Width, Height, length and depth all need to be double and triple checked.
Compare your cabinets with your appliances. Does your oven, dishwasher and fridge fit by width and depth? You will want to take into account the opening of each cabinets, and what way the doors will swing.
Make sure two cabinets won’t bump into each other. Choose which cabinets you want to have a middle stile, and which ones you want open for large appliances, such as your air fryer or instapot.
Once you order your cabinet, they will make them for your specific order, so it will take several weeks. When they come, it will look like this.
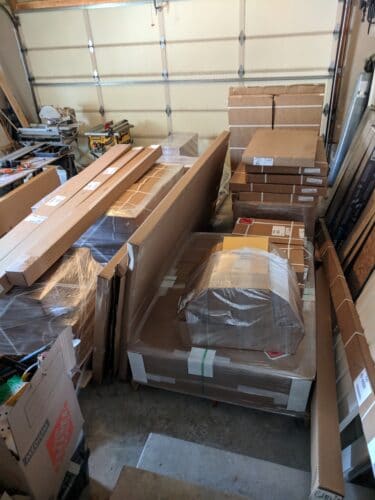
Take a deep breath!
It’s overwhelming, exciting, and exhausting all at the same time. The boxes may or may not be labeled, but the pieces inside will be. Each piece will have a code of number or letters, and should be packaged as such.
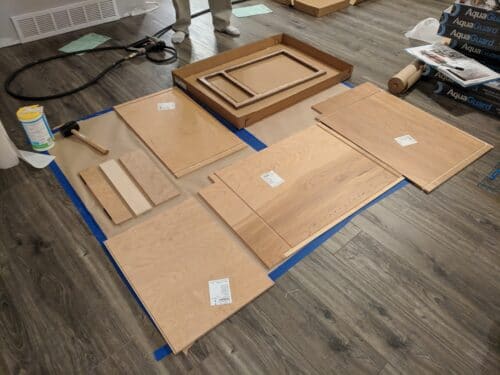
This is a picture of one of the boxes opened up. The face front of the cabinet is in the far top right corner, below that are the sides. You can see the notch for the toe kick on the side panels.
The shelf and bottom of the cabinet are the other two large pieces. The small pieces are toe kick, and top supports.
I would “dry fit” your first few cabinets. This means you follow all these steps without glue or nailing, to verify that you have the right pieces. It is a lot easier to pull apart an unglued mistake, than one that is glued.
Supplies needed:
- wood glue
- mallets
- box cutter
- brad nailer or a nail gun with fine nails
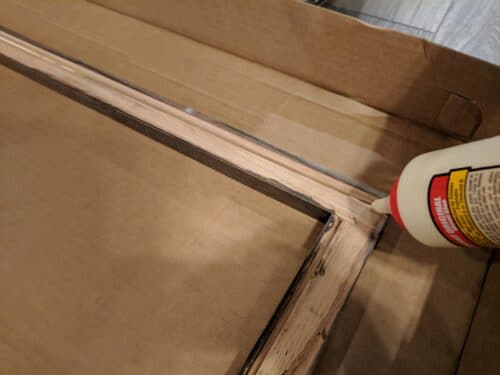
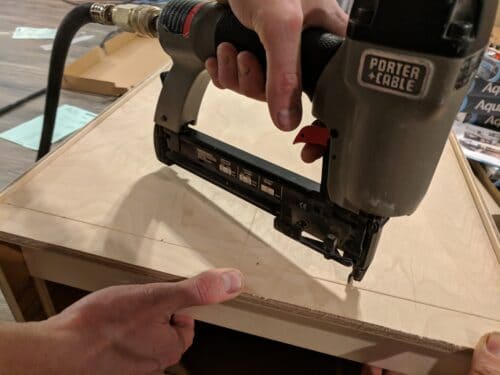
STEP 1: Glue sides to face frame
Find your face frame. This is easy to see, because it will be the paint or stain color you ordered. This will be the front of your cabinet. Lay the face frame in cardboard box, and apply glue to the indented sides.
Insert the sides, making sure any exposed, or painted sides, are on the correct side. Use a mallet to gently push them into the groove.
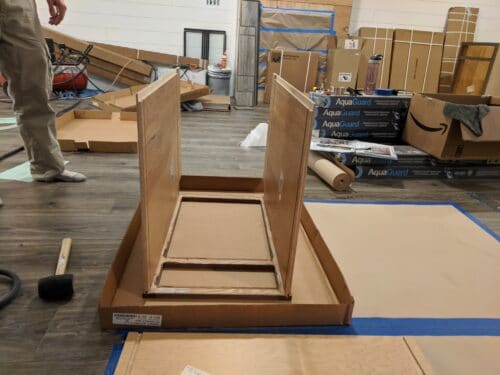
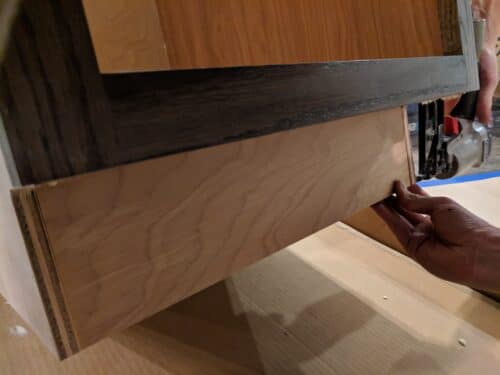
STEP 2: Install bottom and shelves
Install the bottom piece in the same way. Line your groove with wood glue, insert the bottom shelf and use a mallet to get it completely secured into the groove.
Do this for the shelves and the top. Again make sure you are putting the finished side up when working with the bottom shelf. The top shelf will have the finished side down, since all finished sides are what you can see.
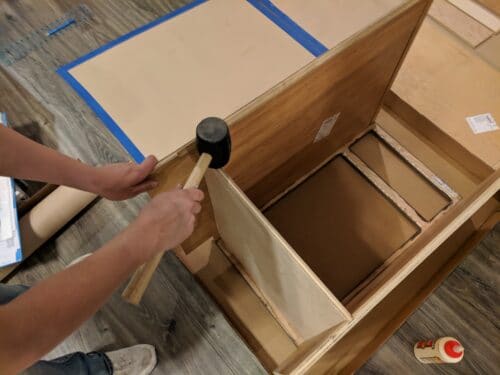
STEP 3: Nail back on
Glue the sides of the back and install it onto the back. Use a mallet to tap it firmly into place. The back of your RTA cabinets should have a guide groove on the top and bottom. This guide is where you will nail it into place. Now, your back has a “top” and a “bottom” make sure your guide groove lines up. If your cabinet back has pilot holes, on the inside for hardware, you will want these to line up correctly as well, so pay attention to them.
Nail the back ever 3 inches to secure it.
STEP 4: Toe Kick
Install the toe kick. This small piece is only found on bottom cabinets. The piece should fit right between your two side panels. Use a nail gun to secure it into place.
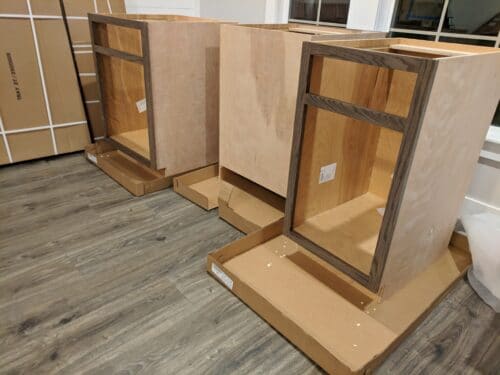
You just made your first cabinet! Now go do that 100 times. Just kidding, it will only feel like that. You will want to allow your cabinets to full dry before installing them. We assembled all our cabinets in the tops of their box, so that wood glue wouldn’t drip onto the floor beneath them.
When it is time to assemble equip yourself with several packages of shimms (I used 4 packages) and a traditional level, or if you are lucky, a laser level like this one. The laser level projects a line onto your walls, from a tripos, making your life heaven with a large job like this.
STEP 5: Install
Each cabinet needs to be level to support the integrity of your countertop. No floors are perfectly even, so, shims will become your friend. No walls are even either. They bow out, they sink in, so again, shims will be your friend.
This step is much easier and quicker with a laser level than a traditional level. Laser levels can be bought at your local hardware store, or the lovely Amazon, like this one. If you don’t have a tripod to hold your level, purchase one with it.
This step took us about 3 hours and would have been double or more without our laser lines projected onto our walls.
When you are installing the RTA cabinets to the wall you can screw in a support beam first, for the cabinets to rest on while you are installing them.
Screw your cabinets together and then against the wall by pairs. Give your wall cabinets plenty of support by screwing into the stud with long nails. These cabinets hold a lot of weight with all those plates, and bowls.

There are lots of videos on Youtube that can give you a great visual tutorial on how to complete this step if you need additional information.
STEP 6: Hardware
Installing drawers and cabinet doors is done last. The hardware comes with your cabinets. Cabinets are often pre-drilled with pilot holes. If this is the case, make sure you installed them correctly, so that the holes line up where they should.

Not only will you save money with RTA cabinets, but you will also learn how to fix any future repairs or problems, since you learned how to build them.
RTA cabinets are not for the faint of heart. If you don’t have time and need cabinets quickly, this isn’t for you. If you are ready to learn and willing to try and try again, this is for you. You can save money and increase your skill set, like never before!
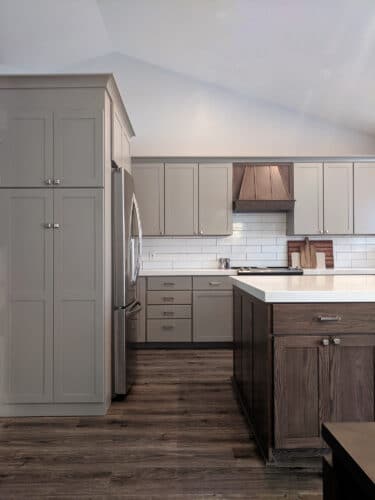
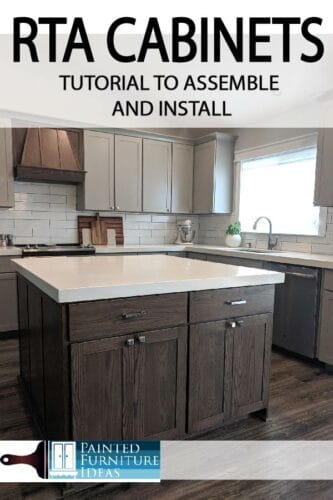
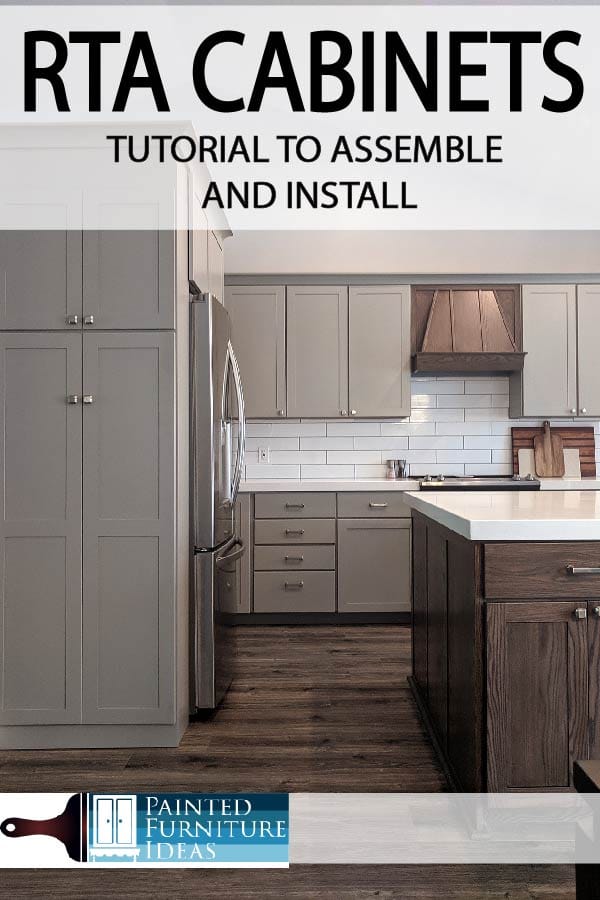
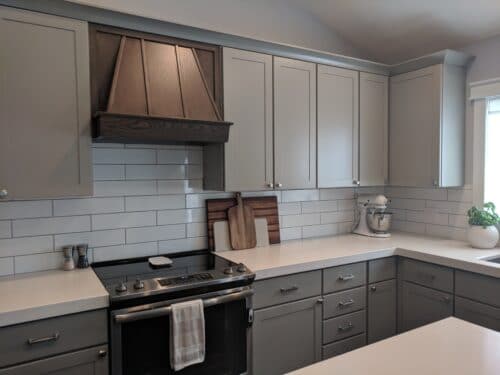
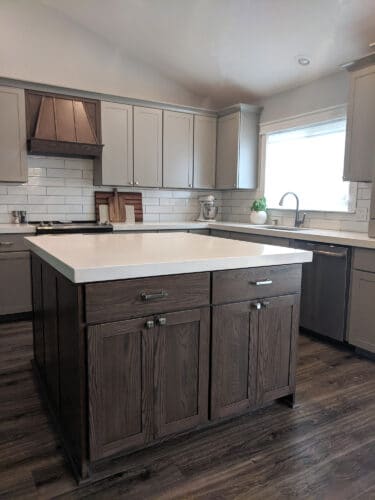
This kitchen features painted Cadet Gray cabinets and Driftwood with Sable stain cabinets from Conestoga Woods. I am not affiliated with this company and have not received anything for this post. I can say, they have great customer service and I am happy with my experience with them.
Love this article? Pin it!