

Are you staring at your old maple cabinets wishing they looked more like all those beautiful kitchens on Pinterest? Is the thought of painting cabinets terrifying? Are new cabinets out of the budget? Don’t worry. We got ya covered.
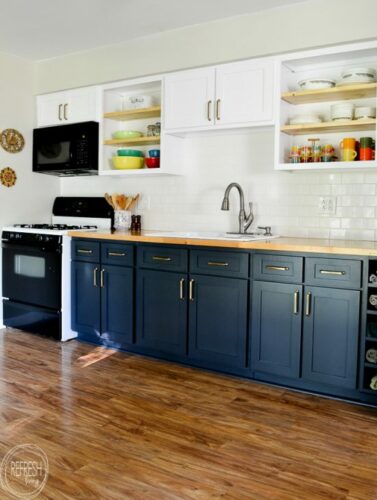
There is another option to completely remodel your kitchen with no paintbrush, no mess, and without breaking the budget. It’s called refacing your cabinets and the results speak for themselves.
Refacing uses a self-sticking wood veneer to cover the fronts and end panels. New doors are installed and the complete project costs about one-third what new cabinets would cost. Another huge plus of refacing is that it doesn’t affect your countertop at all, so you can save even more.

The products available for refacing are simple and easy to use. If you can measure and cut accurately, you shouldn’t have any trouble. Here’s how it works:
Tools You’ll Need:
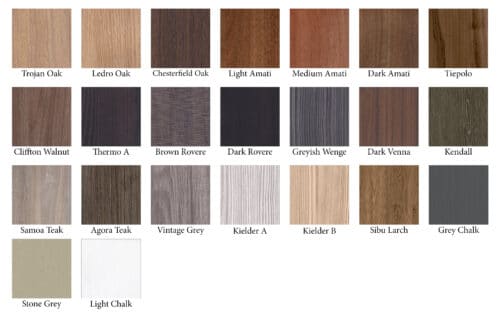
1. Veneer:
Visit your local home improvement to see if they sell the style and color of veneer you are looking for. Getting is local is always beneficial because you can return if necessary, or buy more in the middle if you mis-measured. If you can’t find it available local, you can order full size veneer online and have it delivered to your house.
2. Cutters:
You need something to cut your veneer. A laminate slitter is best and you can rent this if you don’t have access to one, but a table saw also works. For cutting the smaller pieces, a simple paper cutter does a good job.
3. Veneer Tool:
You will need a veneer tool to apply adequate pressure and ensure a good bond. The last thing you want is beautiful white cabinets with floppy veneer hanging off the ends. You can find a veneer scraper tool at any home improvement store.
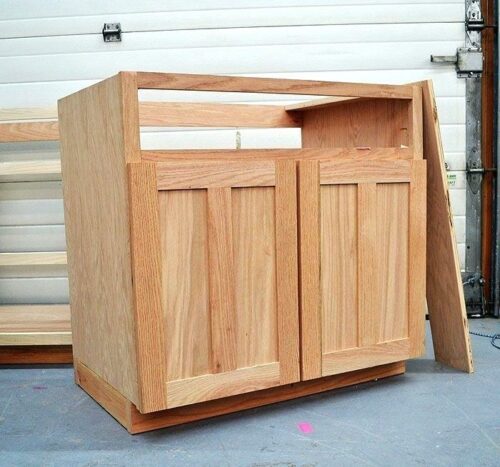
4. Cabinet Doors:
With refacing, you’re covering the cabinet frames with veneer, and simply adding new cabinet doors. This makes a huge cost-saving difference. Covering your existing doors with veneer is not recommended. Veneers are only designed to resurface the flat panels of a cabinet front, not the curves and details of a door. New doors can be purchased at a local hardware store, or online.
No paint brushes (unless you want to repaint them too), no tape, no major construction or need to cover your entire kitchen in
Refacing Start to Finish:
Order Cabinet Fronts:
Start by measuring your cabinets. You’ll want to measure each cabinet to get the sizes for new doors, drawer fronts, and end panels. Once you have these measurements, order your cabinet doors so those will arrive in time.
There are three standard types of cabinet doors: overlay, inset and 3/8-in. lip. Regardless of what type of doors you currently have, in most cases, you can replace them with whichever doors you prefer. Measure carefully at inside corners and between doors to make sure there’s enough room for your new doors and drawer fronts. Remember, you’re going to keep your current cabinets and drawers, just the fronts are replaced. This is most critical part of the cabinet door refacing job is measuring for and ordering the new doors and drawers. Double-check all your measurements and calculations before you place the order.
Order the Veneer:
Next, it’s time to remove the doors and drawers and get started. Once everything is removed, measure and make a list of the veneer strips you’ll need to cover the face frames of your existing cabinets. Veneer typically comes in a 24×96-inch sheet. One sheet is typically enough for about 15 doors and they are usually under $100 per sheet. Determine how many sheets you’ll need and either head to the store or order them online.
Prepare the Cabinets:
To make sure the veneer sticks well, the cabinets needs to be cleaned thoroughly and scuffed up a little bit. Start by removing everything from the inside of the cabinet and cleaning them thoroughly with denatured alcohol. Scuff the surfaces with a sanding sponge. You don’t want to get down to the bare wood, because the veneer won’t stick to that, just give it a little scuff. Clean again with denatured alcohol to remove the dust.

End Panels First:
It’s best to start with the end panels. Be sure to measure a notch for the toe-kick and the overhang. Install the panel with construction adhesive and a few brads. That’s all it takes. Cover all the end panels first, and then you’re ready to move on to the cabinet fronts.
Cut Veneer Strips:
Start by cutting your veneer into the width and length needed to cover up the face frame. This is best done with a laminate slitter. Cut one length at a time, taking care to get the measurements exact. Another option to get perfect measurements is to cut them slightly wider and shave them down with a razor blade once they are installed.
Place the Veneer:
Start by applying the veneer to the vertical outer edge(s). Carefully align it and press to the surface. You can realign it slightly if needed, and then smooth and bond completely with the veneer tool. Then move to the horizontal rails and continue to cover the entire face of your cabinets and drawers.
Doors and Moldings:
Once all of your existing wood is covered in beautiful veneers it’s time to hang the new doors and replace any moldings or hardware. Check your edges for any overhand and carefully sand it flush. If necessary you can use a matching stain pen to touch up the unstained edges of the veneer and any other imperfections.
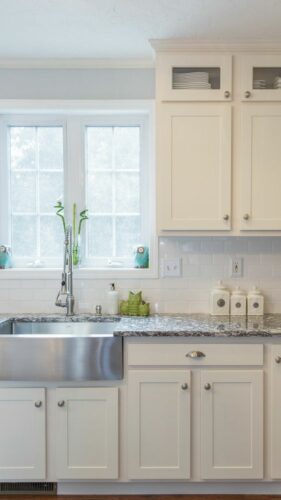
Refacing cabinets is one of the most popular ways to up-level your kitchen space. The time, mess, money, and skill involved in painting cabinets can be overwhelming, especially if you’re not the DIY type. Refacing can be done a little bit at a time, for homeowners who are working all day and can’t take time off to paint. Reface one or two cabinets at a time and you’ll have a brand new kitchen in no time.


