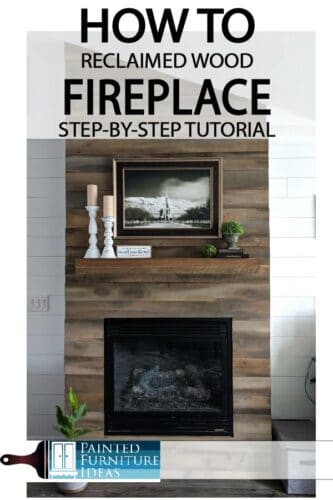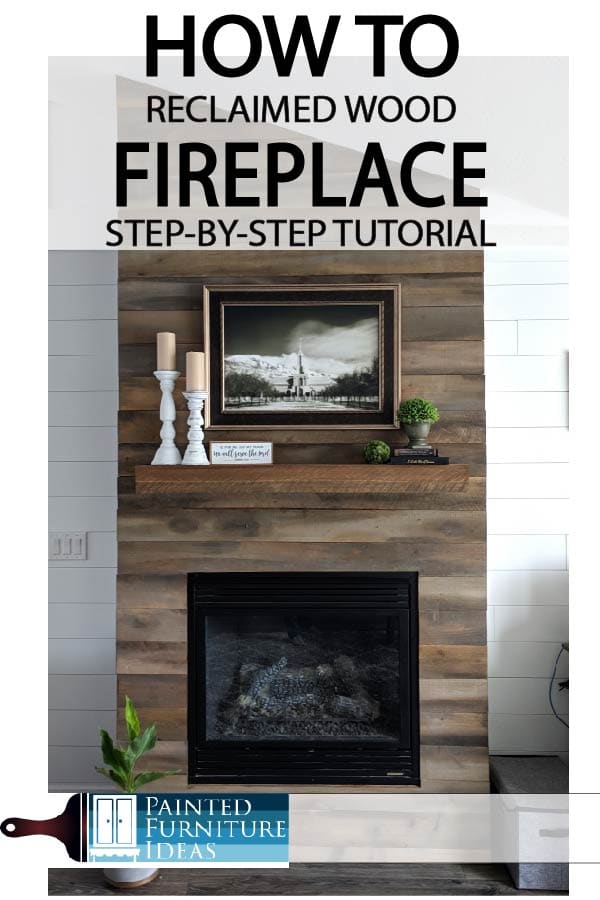
Fireplaces are the center of a home. In the winter my family naturally gravitates, for warmth and traditional Christmas events. In the summer and spring, this is where the Happy Birthday banner hangs and is the natural backdrop to all those birthday photos. My fireplace was outdated and needed a new facelift.
DIY fireplace makeovers are easier than you think. In as little as a weekend you could give your fireplace, and entire family room a new look with some DIY hard work.
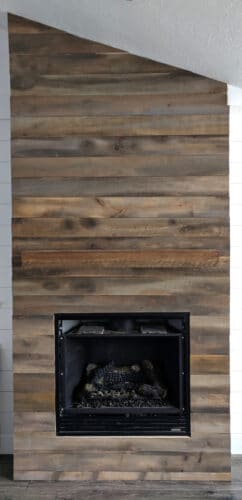
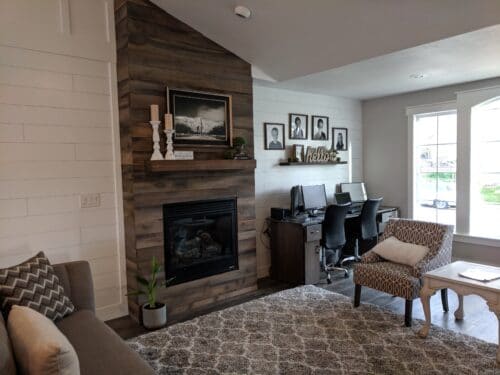
I recently remodeled my entire upstairs, (yes there are more articles to come- stay tuned!!) and the fireplace was what I looked forward to the most. Here is the before fireplace, covered in faux stone. Everything in the room was cream (except for my panel wall I did earlier that year).
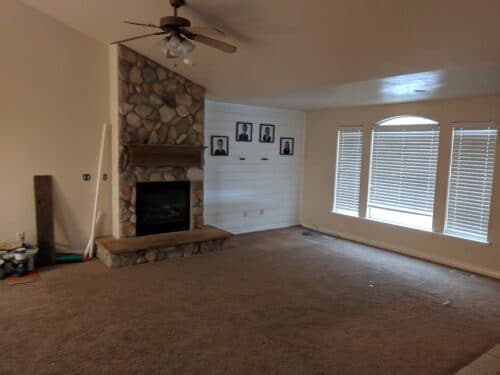
This is my before picture. The faux rock was fading, chipping, and just not my style. When we moved in, it was on my list of things to go, 13 years later it is finally happening! Once you have your new design planned, here are the steps for your own DIY fireplace makeover.
STEP 1: Demolition
Turn off your gas or electricity to your fireplace before you begin. Lay down a large drop cloth to protect your existing flooring (if applicable) and tape around the edge of your existing fireplace to protect it from scratches.
If you are removing faux stone, brick, or wood, it all comes down the same. Hammer your crowbar and jump into some healthy anger aggression therapy.
We were demolishing our entire upstairs, so we rented a dumpster for all our debris. If your job is smaller, borrow a trailer from someone, or just have an overfilled trash can.
Pull off all existing material, except for the plywood that has created the wall or surface of your fireplace. Be careful around the fireplace opening.
STEP 2: Prep New materials
In keeping with my farmhouse style home, I wanted a reclaimed wood fireplace. I looked all around and got quotes for reclaimed wood and mantels, that would put my makeover job in the $1500-$3500 range. No thank you! DIY is the best way to save money. I went to Home Depot and bought Cedar planks for about $1 a piece.
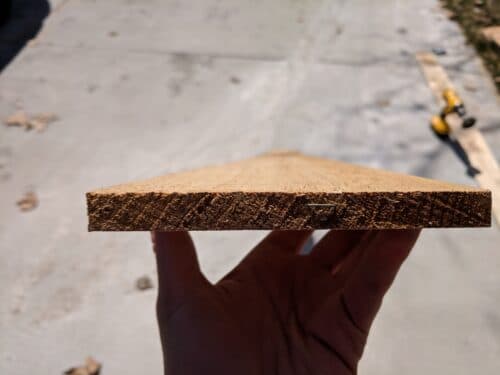
STRAIGHTEN WOOD:
These planks are never straight and needed to be plained on three of the 4 sides. I wanted the outer side of my plank to be rustic and natural, so the back, top, and bottom of each board was plained to make straight edges for assembling.
ADD TEXTURE

Then each exposed side was ruffed up even more. I happen to have this wire brush drill adapter in my garage. It worked like a charm. I ran it up and down the board along with the grain of the wood. You can pick up a wire drill brush at any local hardware store, they are pretty common.
I have heard of people using chains, hammers and anything rough, against their wood to create scuffed texture. This texture really allows the stain to shine, with values of dark and light.
Try a few different items. I created some scratches with a hammer, but found it was a little to rustic for my taste. Do what you love!
STAIN
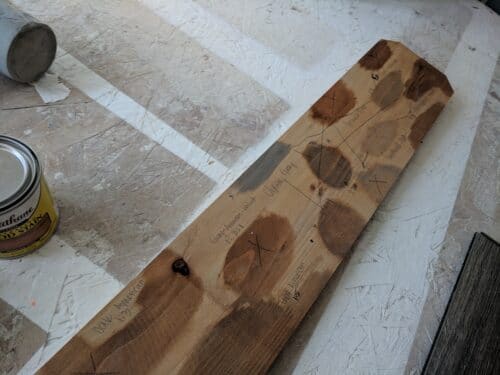
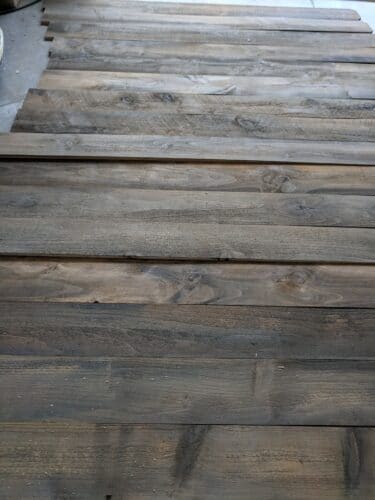
Staining was so much fun. I felt like a mad scientist, mixing a little of this, with a little of that. I started out with about 8 stains. I took on of my boards and experimented with different ratios of stain. I found that the gray was very potent, as well as darker stains like Jacobean. I stopped mixing once I had dark, mid, and light tones I liked.
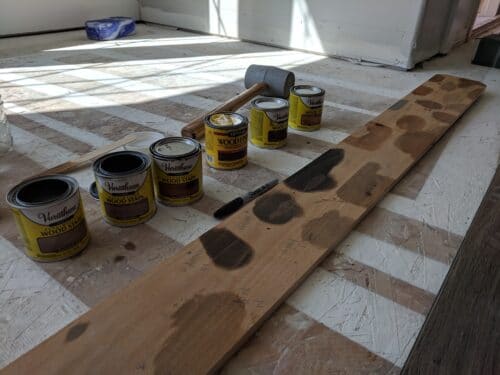
Make note of ratios, while you are mixing, so you can refer back to them as needed. Here you can see I experimented with many different hues, but settled on 2 dark, 2 light, and 2 medium tones. This would give my fireplace variety, while still being unified in tone.
Each board was then transformed from a fence post to beautiful reclaimed wood. I first applied the dark stain to any knots, and along any grain, I wanted to emphasize.
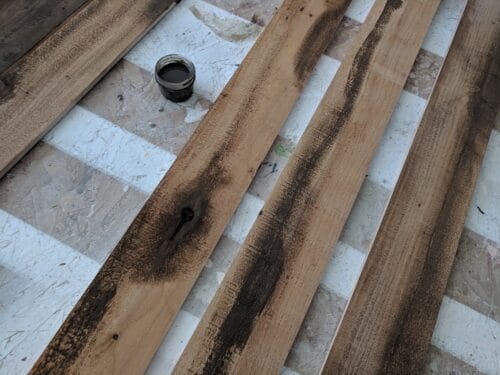
Then I added the light tone to any broad area of the board. The mid stain was added last to fill in the rest of the board. I didn’t stain the ends yet, because they would need to be cut to size during assembly.
Allow your stained wood to sit for several hours, and then double check that you are happy with the color. There were a few boards that turned out too red for my liking, I simply stained them more with a green based stain and it balanced out nicely. If a board is too yellow, add a gray or dark tone like Jacobean to balance it.
Before you assemble the reclaimed wood, check the guidelines for the fireplace, so know how close combustible material (aka wood) can be to the opening. My fireplace had the guidelines printed on a sticker, in the bottom area. It only needed “1 from the opening, which my trim met, so I was able to bring my wood right to the trim edge. Make sure you check your own fireplace, to keep your home safe.
Step 3: Assemble
SIDES
Sides should be done first, so that the face of the fireplace hides up any side seams, giving a more polished look. You will quickly learn that wood bends and moves with time. Our fireplace walls were not even close to level. Shims between my planks were placed to create a perfectly level side.
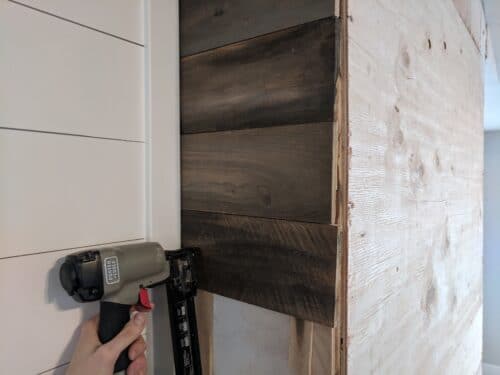
I used an 18-gauge nail gun to quickly attach these panels. You could also use liquid cement, which I bought for the project. I decided to use nails, since I couldn’t really see the hole, and it was less mess.
MANTEL
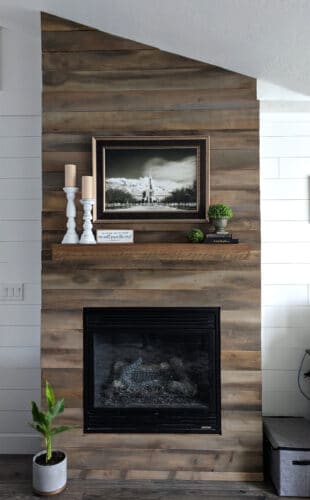
Mantels can be added after the face of the fireplace, or before, depending on your look. Our previous stone fireplace had the mantel added last, and sat upon the material. For my new look, I wanted the mantel to be flush with the wall, and place the reclaimed wood planks around it.
My mantel was a large block of poplar wood, that I got at a lumber yard for $40. The cheapest reclaimed mantelpiece I could find was $375. Thank you lumber yard!
Cut the mantel to size with a table saw and stained it. Commonly used 6” T brackets work great for floating shelves, like this mantel however, we had wall brackets on hand and used these screws to install them.
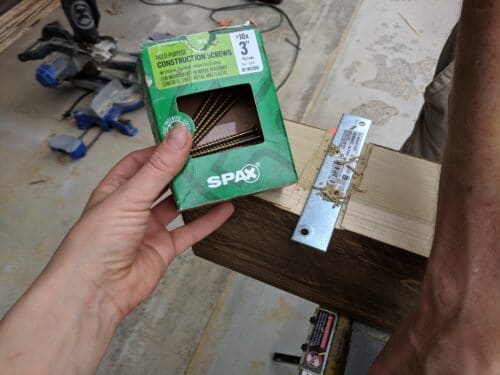
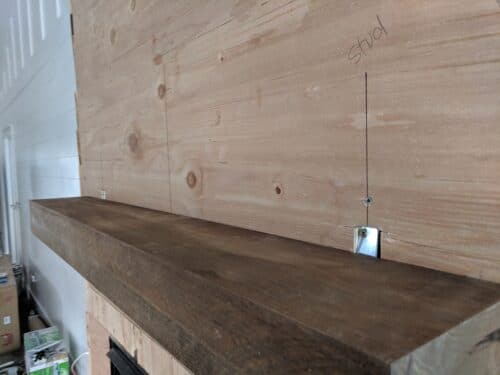
Mark your fireplace wall, with any studs, the center and the edge of where your mantel will go. Install your brackets into the studs. My wall brackets would create a small bump in the wall, so we used a multi-tool saw to cut out the are for the brackets to be secured right onto the stud, like so.
Drill corresponding holes into your mantel, so that it will sit on the brackets. I cut my mantel to be 7 inches deep so that the brackets would reach most of the length of my shelf.
FACE
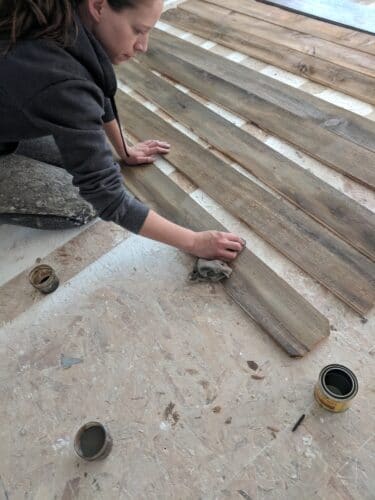
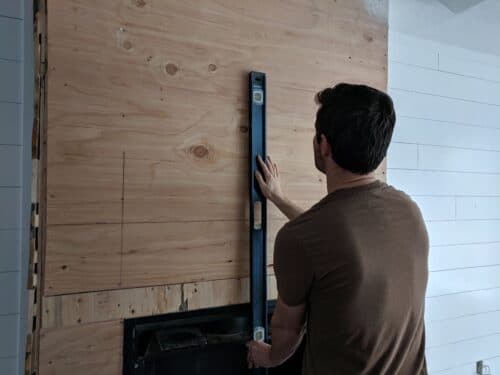
Assemble the face of the fireplace with your planks. I found it useful to layout my planks first, to avoid two similar planks being right next to each other. Measure each piece, then cut. Don’t assume your planks will all be the same width. Each wall bows and is usually not perfectly square.
Cut sides needed to be stained at this point. I used my medium stain and quickly stained the edges.
I did not put a topcoat on my wood. I wanted a matte finish, and wasn’t too concerned about protecting it from scratches.
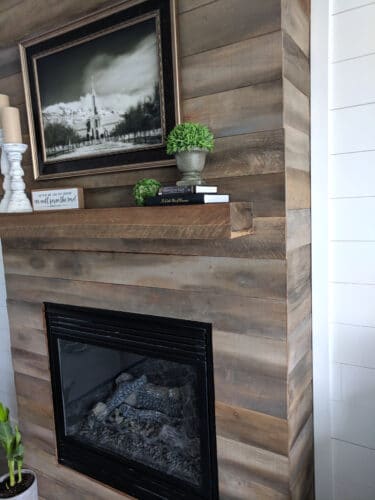
This reclaimed fireplace cost me a total of $150, which was 10% of the quote I was given by a contractor. If you are looking to upgrade your family room, the fireplace is the heart of this room and makes a big change.
I hope you enjoyed this fireplace tutorial. Stay tuned for more articles featuring my remodel including the white panel wall, trim around the windows, installing flooring, and even more projects in my kitchen.
If you want to remember this article, pin it and follow me on pinterest to see more diy ideas for your home!