Sponge painting is one of the oldest DIY techniques known to man. I’m fairly certain cave women used sponges to spruce up their caves while the cave men were out dragging around clubs.
Why has sponge painting lasted through all these years? Because it’s 1) easy and 2) beautiful. It’s requires no special tools, no expensive equipment, and no difficult process. Here’s how it goes.
Picking Colors

This is the hardest part of sponge painting. You can use one, two, or twelve colors, depending on the look you’re trying to achieve. Using one or two colors makes a bold look with heavy contrast. More colors create a subtle, cloudy, or blended effect. The best way to pick colors is by experimenting on a spare piece of wood or cardboard.
You can choose several different colors, or a more monochromatic look by choosing a similar pallet of colors in different hues. The only way to get exactly what you want is by trying it out and finding what works best.
Picking Sponges:
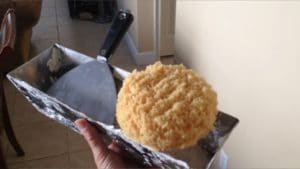
The natural sea sponge produces the best result. These sponges are more expensive, but they leave a more varied, random pattern. They are easy to clean and last a long time, so you only need one sponge for the entire wall. You can use other sponge products, but cheaper sponges are often harder to work with and more difficult to create the blended effect you’re looking for.

The Process:
Sponging is very easy. Start with a base coat of paint on the wall. This color will show through, so choose a neutral color that won’t dominate. Then, when you’re ready to add your sponge technique begin by mixing your paint with a glaze. Use a latex-based glaze with latex paint. The glaze thins out the paint making it more translucent, making the sponging technique to work better by allowing several layers to show through. You can also use glaze extender, which slows down the drying process and makes it easier to blend colors.
Once your base coat is on the wall, dip the sponge in the colored glaze and squeeze out the excess so the paint does not drip. Pat the wall and watch the colors come together naturally. Pat in a random pattern, working from top to bottom. Continue this technique with the second, third, and even fourth colors until you achieve the desired look.


