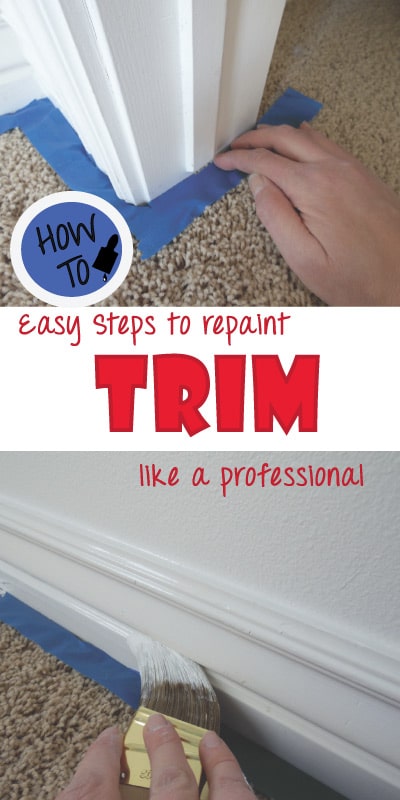
Trim is something often overlooked in a room, even though it has a huge effect on the overall feel of the room. Go look at your baseboards….seriously..leave the screen and check them up close. They’re probably as nasty as mine. Baseboards and trim around doors get used and abused, they are rarely cleaned and often forgotten.
The trim is what gives the room a finished feel. This is why repainting my trim is one of my favorite tasks. It is easy and quick and makes my house feel new again.
This article is for those that need to repaint trim. If you are painting new bare trim, make sure you sand it, chalk the edges and prime before starting the following steps. Painting trim is usually done with a Semi-Gloss or Gloss sheen, and a small quart can will be plenty for one room. For this project, I used semi-gloss acrylic paint.
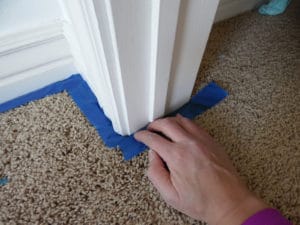
1- Lay down tape. You don’t need to tape the top of your trim, if you have a decent steady hand. If you are unsure, tape the top so you don’t get your trim paint on the walls. Try to get that blue tape right next or even under the baseboards.
2- Wipe down quickly, we don’t want to paint over dirt since that just traps it in creating a bumpy finish.
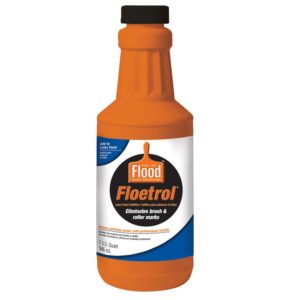
3- Add Floetrol, it is a conditioner for paint and gives it a smooth, no brush stroke finish. Just stir in the small amount listed on the bottle. You can purchase some floetrol here as well.
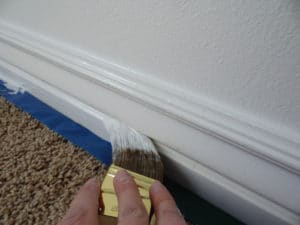
4- Paint the crevices and detailed woodwork first using the edge of your paint brush. Then paint the top by slowly pulling your brush towards you. Then take the side of the brush and paint the rest of your trim, using long horizontal strokes.
Do you see the difference in these baseboards? Both are white but the one one the left is freshly painted. Yes it makes a small difference, but this difference lines the entire room and doorways, affecting the entire room. 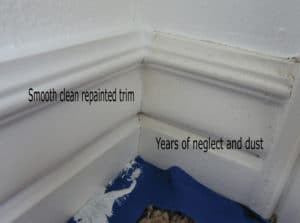
Don’t forget to continue painting the trim around the doors. Remove the doors by taking off the hardware.
Yucky grease marks from years of use, now you see them….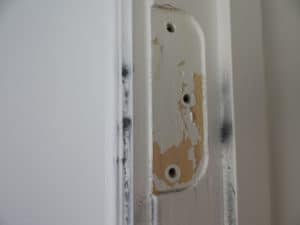
Now you don’t…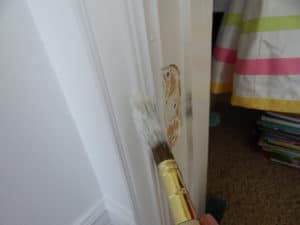
AAhhh…just like new!
Let your dry for at least 3 hours before pulling off the blue tape. I hope you feel confident in your next trim project.


